Create a project
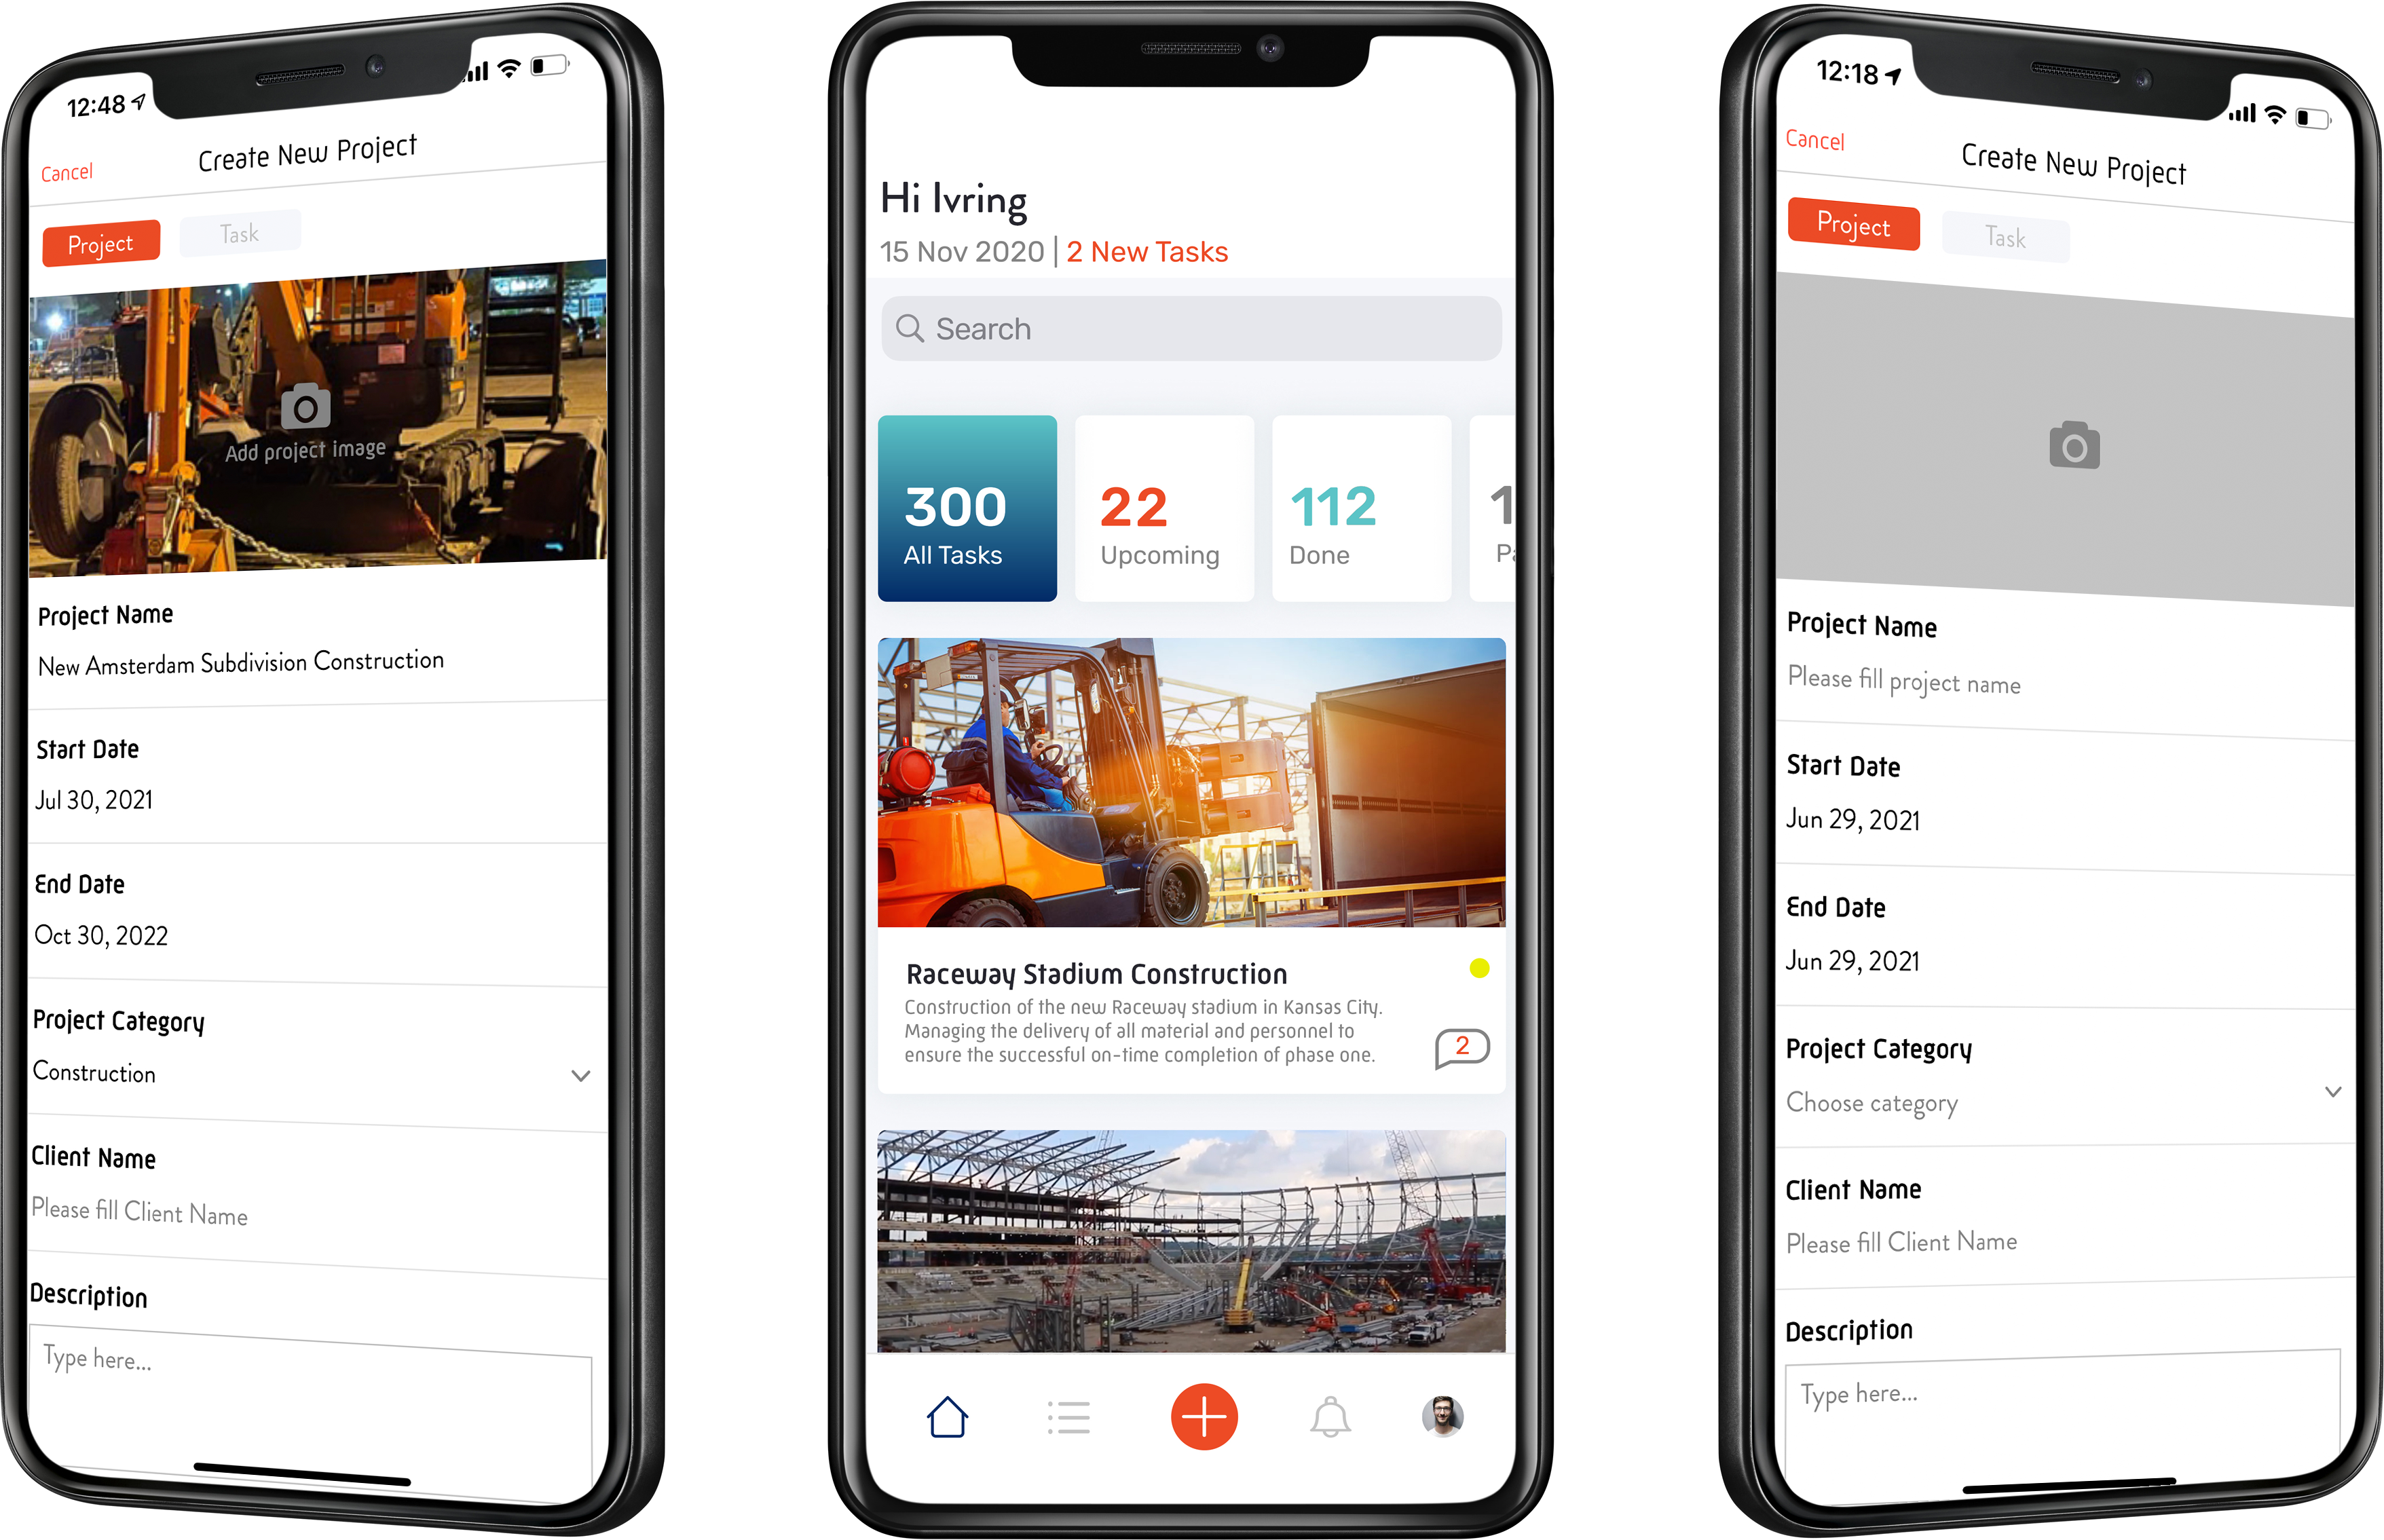
The first step in using the IBIS SaaS application is to create a project. All task and task activities are done within a project. Creating a project is a straightforward process. Click the create new project button, add a project image, fill out the project name, fill out the project name, and additional basic information about the project.
1. Project Name
2. Start and End Date
3. Project Category
4. Client Name
5. Project Description


Add a task to the project
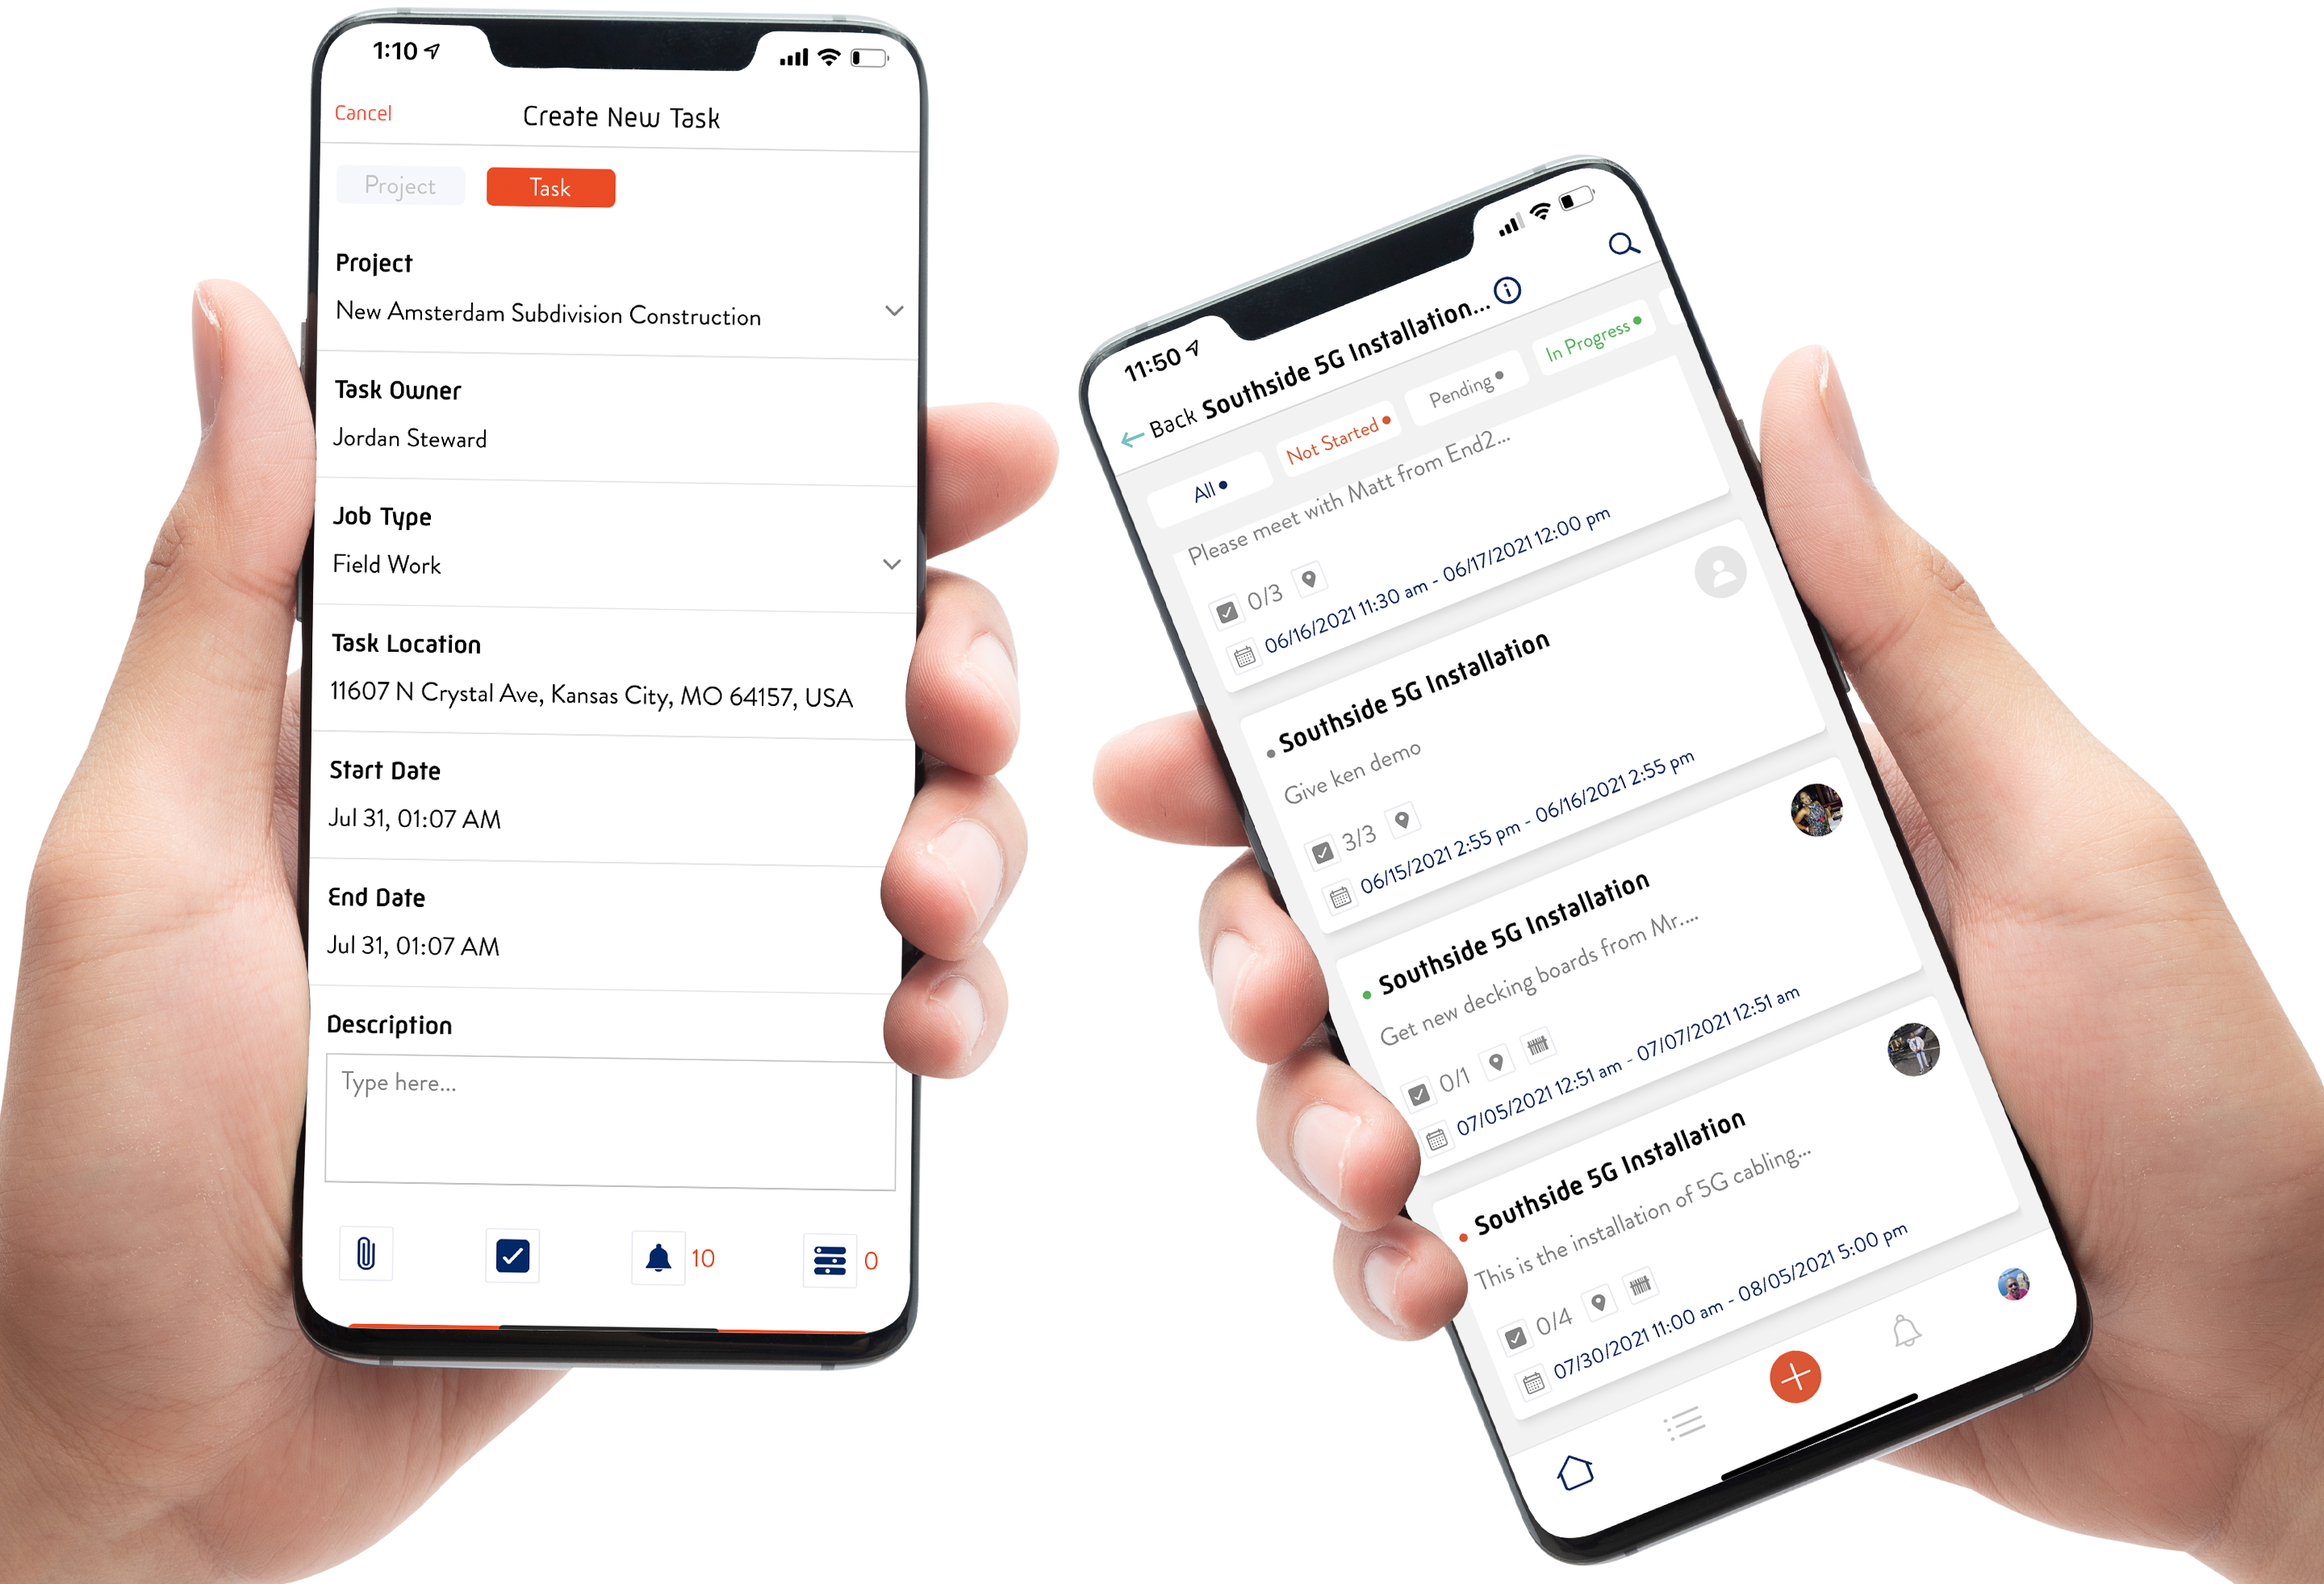
Now that we have an active project, the next step is to create a task. We can create as many tasks as necessary to complete our project. We create a task by first selecting the project we want to add and then clicking the add new task button.
Creating a task requires some basic information.
1. Task Owner (The person responsible for completing the task.)
2. Job Type (This helps to categorize the task)
3. Task Location (The address/location the task should be done)
4. Task Start/End Date
5. Description of the task
Add task completion requirements.
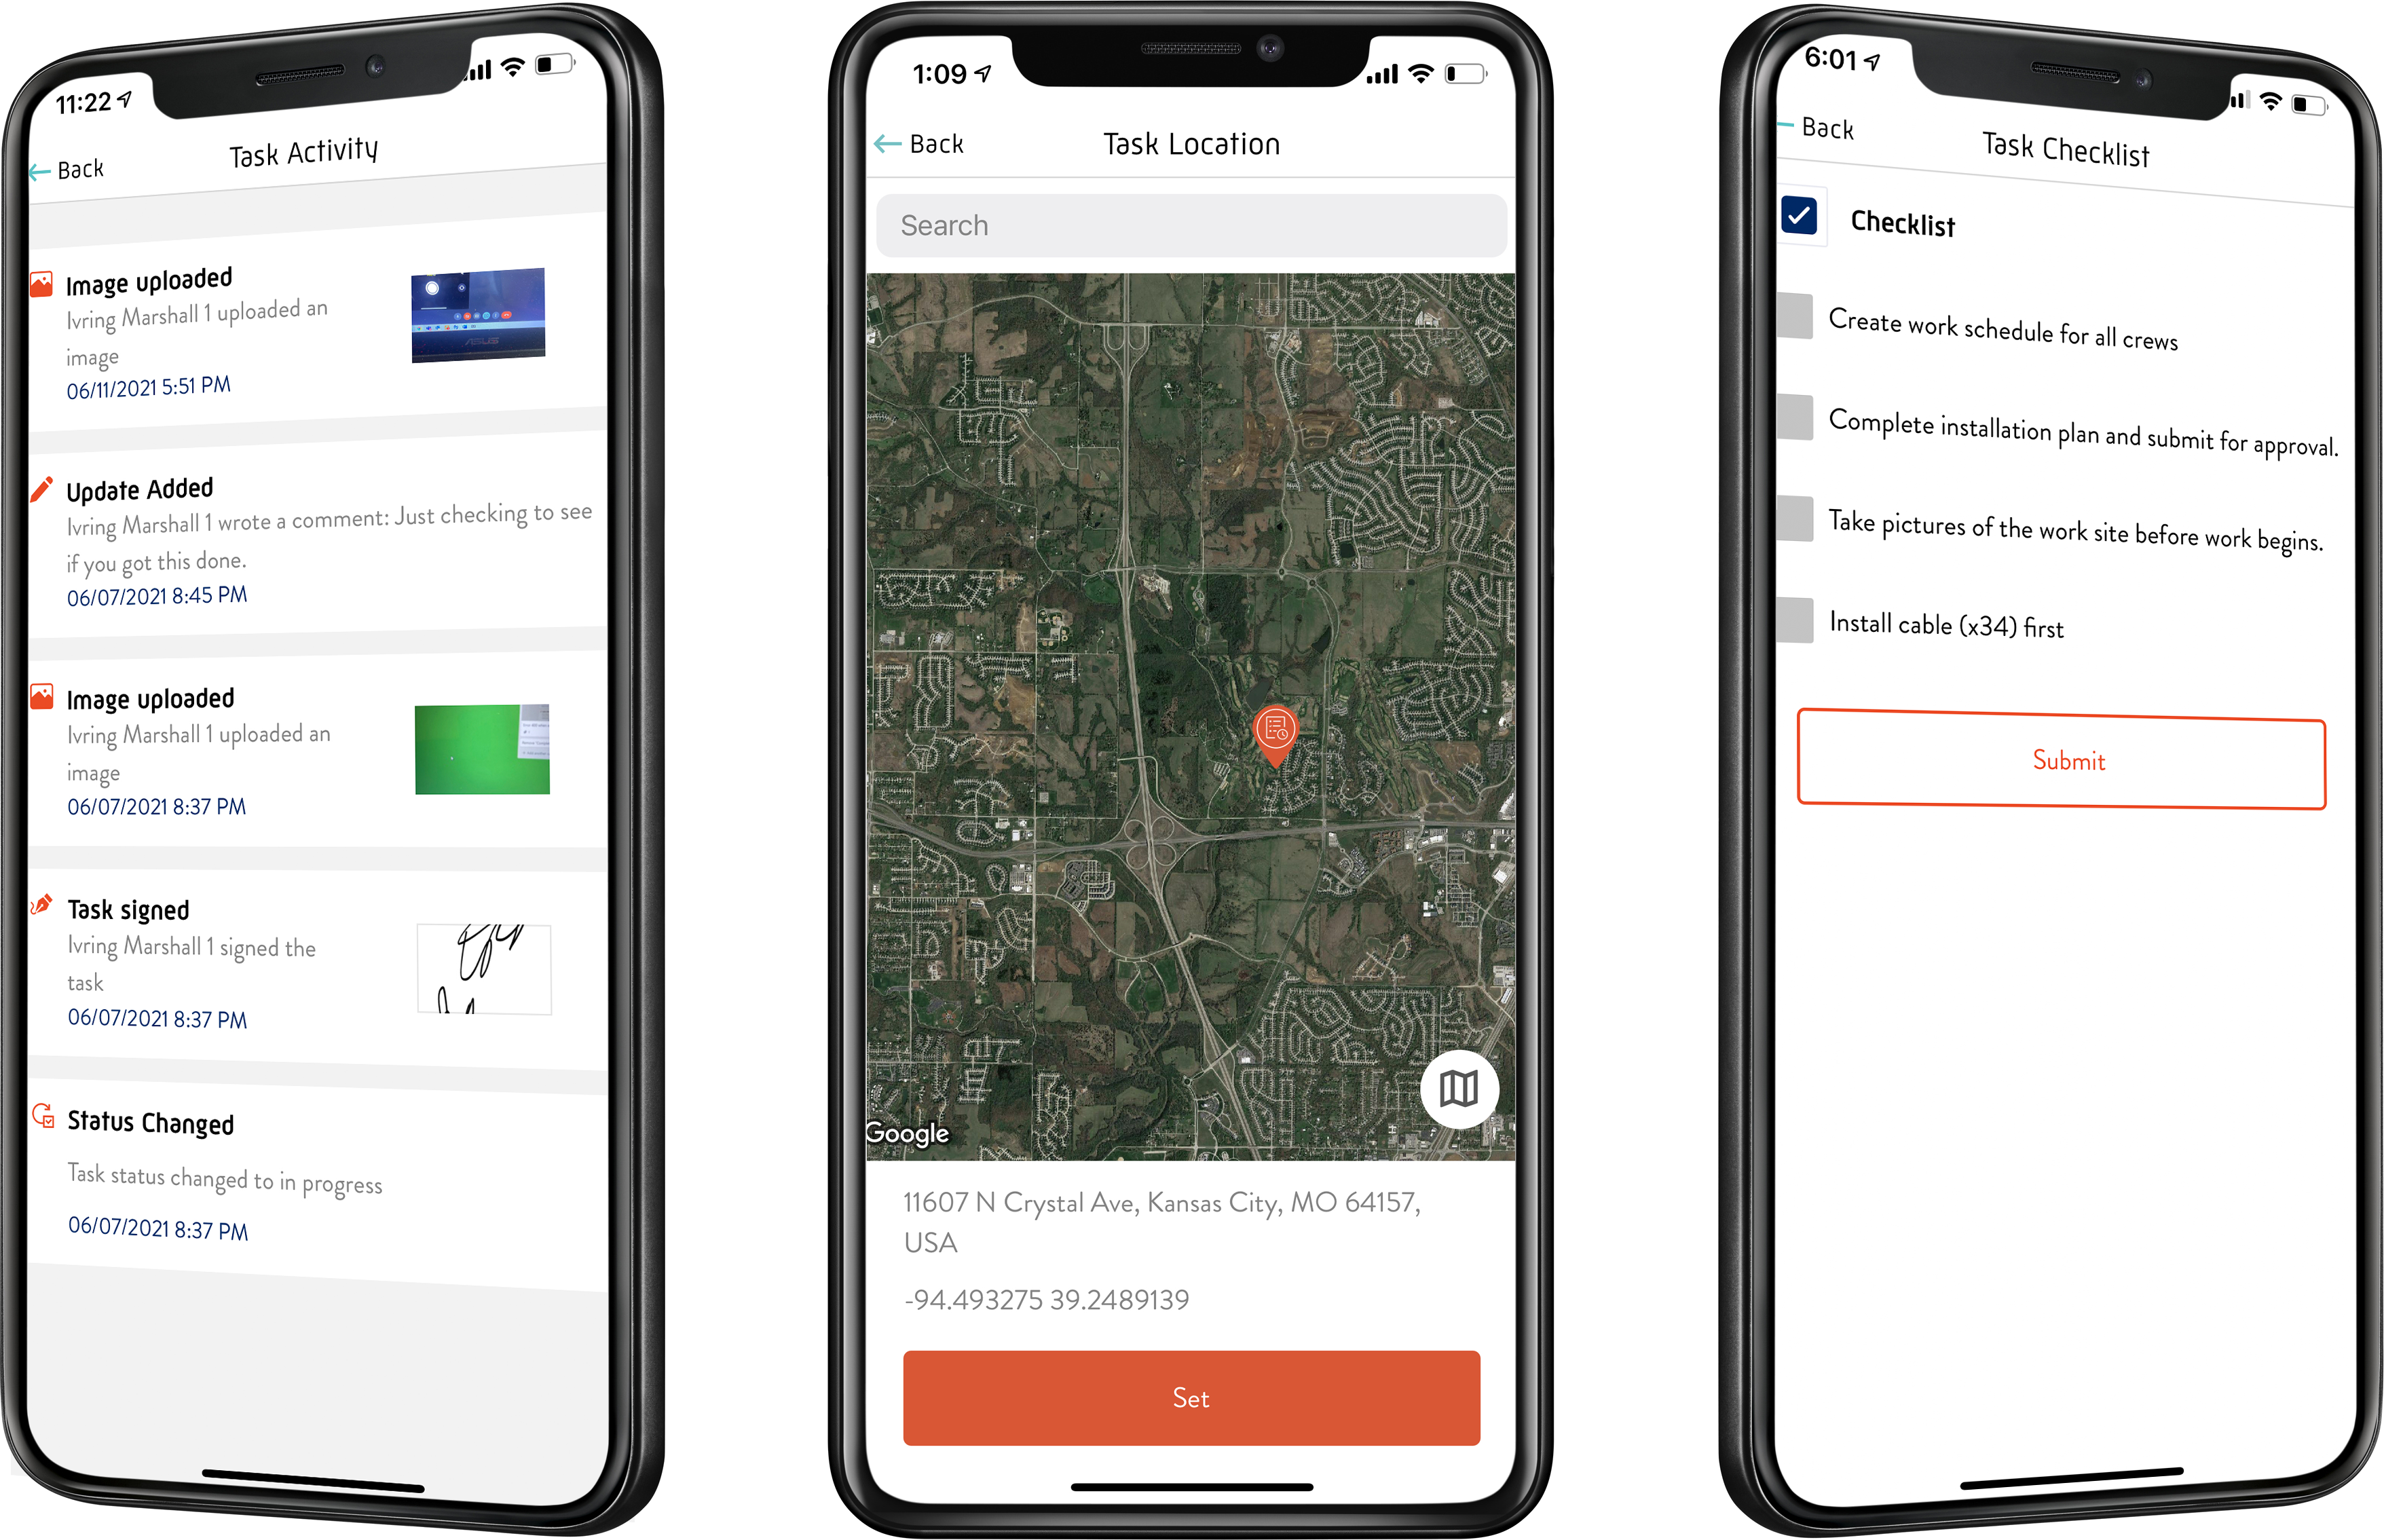
Now that you have the task created, you can set the requirements for completing the task. All task completion requirements are optional, and only the ones relevant to your task should be selected.
1. Set notification activities (These will be events that will send notifications to the task manager.)
2. Upload attachments. (Attachments can include documents, images or videos)
3. Create a checklist (The checklist allows you to define the task completion milestones more narrowly.)
4. Turn on inventory scanning.


Monitor task activities
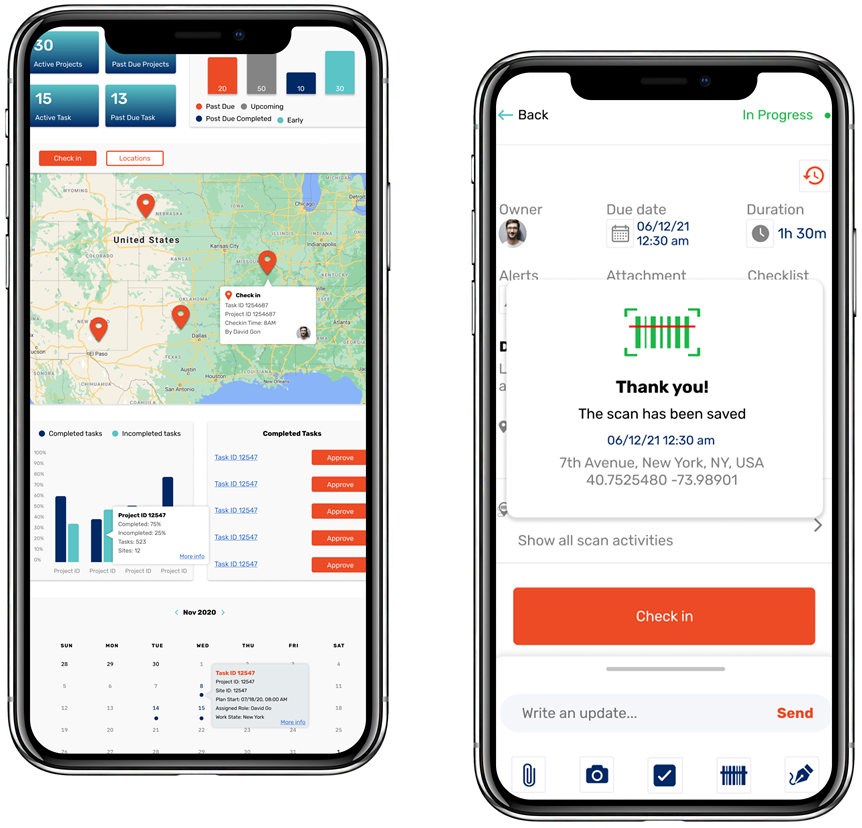
Now that the task has been created, the task manager (The person who created and gave out the assignment) can monitor and be notified of all activities in real-time.
Some of the activities that are managed in real-time.
1. Task owner check-in/out of work location.
2. Uploading pictures and video
3. Checklist item checked off.
4. Inventory item created
5. Inventory item scanned
6. Task pending completion approval.
7. Signature submitted
And many more...